As most of you know,
I undertook a big project over the summer when deciding what to do for a headboard in my room. I wanted to do something different, and finally decided upon turning a fireplace mantel into a headboard after finding this amazing crackled yellow mantle in a local antique shop.

After scouring the internet for how-to's of mantle/headboard crafting.. we discovered there are hardly any tutorials. So I thought, why not share how we made mine!
First, we sealed the mantle with some polycrylic from Ace Hardware. I used a semi-gloss so it had a slightly glossy finish.. but go for matte if that's your style. ;) I painted two coats to make sure it was gooooood and covered.
Next, have a piece of plywood cut to fit inside the "fireplace" opening of the mantle. With a few inches overlap so that you can actually attach it to the mantle. We did about two inches on each side.
I upholstered this piece of wood, and attached buttons for the "puckers." So measure out where you want the puckers to be on the back side of the plywood. I did 3 along the top, 2 in the middle, and 3 along the bottom.
We used upholstery thread, you can find it at JoAnn fabrics or Hobby Lobby, and it's strong enough to do the job.
Next, drill holes in the back according to your measurements so you have a spot to thread the needle through to your button.
Then, take a 1-inch thick roll of foam and cut it to fit the "fireplace" insert of your mantle. Using spray adhesive, attach it to the plywood. (Remember not to attach it to the "overlap" areas of the plywood.)
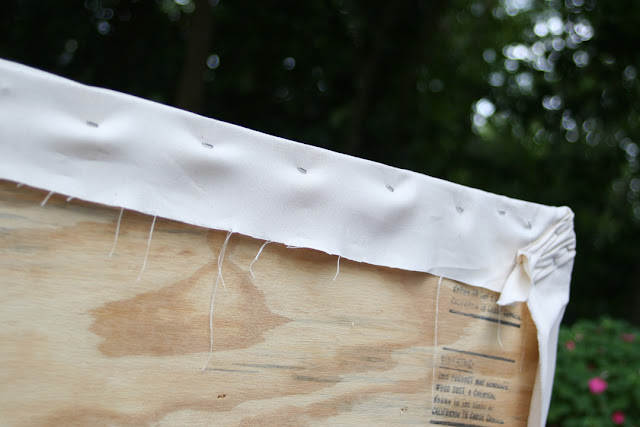
After using adhesive to attach the foam, stretch your fabric over the foam and using a staple gun.. attach it to the plywood.
Using your upholstery needles and thread, thread through the holes you drilled to attach your buttons. Pull TIGHT in order to create the "pucker" look.
A view of the back:
Then attach the insert to your mantle... with antique mantles you don't always know what you might find... so it can be tricky!
And boom!
We then attached it to a basic Queen bed frame with some ghetto-rigged nonsense. We got some brackets.. lumber... screws... bolts... and the good Lord knows what else, but it's sturdy and it WORKS.
and it loooooks like....
 |
| I need to take more recent pictures, because I've added to the trinkets along the top since this was taken. |
I love having a unique headboard, and it makes it so much more special that I antique'd and crafted it up to make it what it is.
So get out there and make a project! I love seeing DIY tutorials!


